Ⅰ.SPECIFICATIONS
|
Product Name |
Model No. |
Rated Power |
Rated Voltage |
Rated Frequency |
|
AIR FRYER |
KY-1037V-13 |
1300W |
220-240V~ |
50-60Hz |
Ⅱ. PRODUCT ILLUSTRATION

- Frying Basket
- Oil Separator Plate
- Viewing Window
- Handle
- Timer Knob
- Temperature Control Knob
- Heating Indicator Light
- Power Cord
- Air Outlet Cover
Ⅲ.OPERATION INSTRUCTIONS
First Use
- Remove all packaging materials.
- Thoroughly clean the frying basket and air fryer using hot water, a small amount of detergent, and a non-abrasive sponge.
- Note: These parts can be cleaned in the dishwasher.
- Wipe the product housing and interior with a damp cloth.
- Place the product on a stable, level surface.
- Properly place the frying basket into the air fryer.
- Insert the oil separator plate into the frying basket.
Operation Method
- Plug the power cord into a grounded socket.
- Carefully pull the frying basket out of the air fryer.
- Place ingredients into the frying basket.
Note: Load an appropriate amount of ingredients; do not exceed the height of the frying basket itself.
- Push the frying basket back into the air fryer. Do not use the appliance without the frying basket.
Note: The air fryer and ingredients will be hot during use and for a short time after use. Do not touch them.
- Refer to the ingredient recommendations on the sticker at the top of the appliance to determine the required cooking temperature and time for the ingredients.

- Turn the temperature control knob to the desired temperature.
- Turn the timer to the desired cooking time; the product will automatically turn on the power and start heating.
- The timer will count down from the set cooking time, and the heating indicator light will turn on simultaneously.
- During the air frying process, the heating indicator light will remain on, indicating that the heating device is turning on or off to maintain the set temperature.
- When the timer counts down to 0, the product will sound a bell and then turn off automatically. To turn off the product manually, turn the timer knob counterclockwise to 0.
- Carefully pull the frying basket out of the product and place it on a heat-resistant surface.
- Check if the ingredients are fully cooked. If not, simply push the frying basket back into the product and set an additional time on the timer.
- Scoop the ingredients from the frying basket into a bowl or plate. For larger or fragile ingredients, use tongs to remove them from the basket.
- After one batch of ingredients is cooked, the air fryer can immediately cook another batch.
Tips
- After air frying, both the frying basket and ingredients will be hot, and steam may escape from the air fryer.
- Smaller ingredients usually require less cooking time than larger ones.
- A larger quantity of ingredients will require slightly longer cooking time, while a smaller quantity will require slightly shorter time.
- Shaking small ingredients halfway through cooking can improve the cooking effect and prevent uneven frying.
- Adding a small amount of oil to fresh potatoes can result in a crispy texture.
- Snacks that can be cooked in an oven can also be cooked in the air fryer.
- The ideal weight for cooking crispy French fries is 500 grams.
- Commercial dough can be used to quickly and easily make pastry snacks. Commercial dough also requires less cooking time than homemade dough.
- You can also reheat ingredients in the air fryer. For reheating, it is recommended to set the temperature to 120°C and the time to 10 minutes.
Ⅳ.Cleaning and Maintenance
- Always unplug the product after use.
- Clean the product after each use.
- Allow the product to cool for approximately 30 minutes before handling or cleaning it.
- The air fryer, frying basket, and product interior have a non-stick coating. Do not use metal kitchen utensils or abrasive cleaning materials for cleaning, as this may damage the non-stick coating.
- Unplug the power cord from the socket and allow the product to cool.
- Note: Removing the frying basket helps the air fryer cool down faster.
- Wipe the outer surface of the product with a damp cloth.
- Thoroughly clean the frying basket and air fryer using hot water, a small amount of detergent, and a non-abrasive sponge.
- Note: Grease cleaners can be used to remove residual stains.
- Clean the product interior with hot water and a non-abrasive sponge.
- Use a cleaning brush to clean the heating element and remove food residues.
- For storage, unplug the product, allow it to cool, and ensure all parts are clean and dry.
Ⅴ.WARNINGS & CAUTIONS:
- Do not immerse the housing in water or clean it under a tap, as the housing contains electronic components and heating elements.
- Do not allow water or other liquids to enter the product to avoid electric shock.
- Always place ingredients in the frying basket for cooking to prevent contact with the heating element.
- Do not cover the air inlet or outlet while the product is in operation.
- Do not pour oil into the frying basket, as this may pose a fire hazard.
- Do not touch the interior of the product while it is operating.
![]()
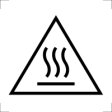
CAUTION! HOT SURFACE!
During use and operation, this appliance becomes hot. Be careful and avoid contact with hot parts (trays, grill, and fryer).Handle the appliance by holding it by the handles or using appropriate utensils.This symbol indicates that the surface may become hot during operation of the product.
Before connecting the product to the power supply, check that the voltage marked on the product matches the local supply voltage.
Before connecting the product to the power supply, check that the voltage marked on the product matches the local supply voltage.
-
This appliance is intended for use in domestic and similar applications, such as:
- Staff kitchens in shops, offices, and other work environments;
- Rural homes;
- By guests in hotels, motels, and other residential environments;
- Inn-type environments.Products can only be sent to the factory or maintenance center repair, do not repair by yourself.
- Do not use the product if the plug, power cord, or the product itself is damaged.
- Keep the product and power cord out of reach of children.
- Do not place the product on a heat-sensitive surface.
- Do not let the power cord come into contact with hot surfaces.
- Never plug in the product or operate the control panel with wet hands.
- The product must be plugged into a grounded socket, and ensure it is properly inserted.
- This product cannot be operated using an external timer or independent remote control system.
- Do not place or use the product on or near flammable materials such as tablecloths or curtains.
- Do not place the product against a wall or other products. Allow at least 10 cm of free space behind, on both sides, and above the product. Do not place any objects on the product.
- Do not use this product for any purpose other than those specified in this manual.
- The product must be supervised when in use.
- During air frying, high-temperature steam will be released from the air outlet. Maintain a safe distance from the steam and air outlet. Also, be cautious of hot steam and air when pulling the frying basket out of the product.
- When the product is in use, its accessible surfaces may become very hot; use with care.
- If the product emits black smoke, unplug it immediately. Wait until the product stops smoking before pulling the frying basket out.
- Do not fry fresh potatoes at temperatures above 180°C (to minimize acrylamide formation).
- Do not place anything on top of the air fryer, as this will disrupt airflow and affect cooking results.
- Place the product on a level, stable surface.
- This product is intended for household use only. Improper use, use for professional or semi-professional purposes, or failure to follow the instructions in this manual will invalidate the warranty, and the company shall not be liable for any resulting damage.
- This product is not suitable for use by persons with physical, cognitive, or mental impairments, or those lacking knowledge and experience, unless supervised and instructed by a person responsible for their safety.
- Do not allow children to play with the product.
-
When using the product for the first time, slight smoke may be produced, which is normal.
Ⅵ.Troubleshooting
|
Problems |
Possible Causes |
Solution |
|
Air fryer fails to operate |
Product not plugged in |
Plug the power cord into a grounded outlet. |
|
No timer duration set |
Turn the timer knob to the desired cooking time to activate the appliance. |
|
|
Air fryer does not cook food thoroughly |
Excessive food in the basket |
Reduce the amount of ingredient |
|
Set temperature too low |
Turn the temperature control knob to the appropriate setting for the ingredients |
|
|
Cooking time too short |
Adjust the timer knob to a more suitable cooking duration |
|
|
Cannot smoothly insert the fryer basket into the appliance |
Overloading the basket |
Load an appropriate amount of ingredients, ensuring they do not exceed the height of the fry basket |
|
Basket not properly placed in the fryer |
Press the fry basket down into the fryer until it clicks into place |